At Home Flu Test Kits: How They Work and Accuracy Explained
At Home Flu Test Kits: How They Work and Accuracy Explained
Waking up with a fever, chills, and a deep chest cough, you face a modern dilemma: is it just a bad cold, or the flu? In the past, answering that question meant a potentially stressful trip to a clinic or doctor’s office, exposing yourself and others to more germs. Today, at home flu test kits offer a compelling alternative, delivering rapid results from the comfort of your couch. These over-the-counter diagnostic tools have surged in popularity, empowering individuals to take a more active role in managing their health. But how exactly does a small swab from your nose provide an answer in minutes? More importantly, can you trust the result? Understanding the science behind these tests, their proper use, and their real-world accuracy is crucial for making informed healthcare decisions and knowing when to seek professional guidance from a telemedicine service like Doctors Home.
The Science Behind Rapid Influenza Detection
At home flu test kits, often called rapid influenza diagnostic tests (RIDTs), are designed to detect specific proteins, called antigens, found on the surface of the influenza virus. The most common technology used in these consumer kits is a lateral flow assay, the same fundamental principle behind many pregnancy tests and rapid COVID-19 tests. When you perform the test, you are essentially creating a controlled chemical reaction. The sample collected from your nasal cavity contains viral particles if you are infected. As this sample moves along a test strip via capillary action, it encounters antibodies that are specifically designed to bind to influenza antigens. This binding event triggers a visual signal, typically a colored line on the test device.
The process is engineered for simplicity, but it relies on precise biological interactions. The antibodies on the test strip are highly selective for influenza viruses, which helps minimize false positives from other respiratory pathogens. However, this specificity also means the test is looking for a particular viral signature. Most at home flu kits are designed to detect Influenza A and B, the two main types responsible for seasonal epidemics. They do not typically differentiate between strains (like H1N1 or H3N2) or identify other viruses that cause flu-like symptoms, such as Respiratory Syncytial Virus (RSV). For a broader look at multi-pathogen testing, our guide on at home flu and RSV test kits explains how combined tests function.
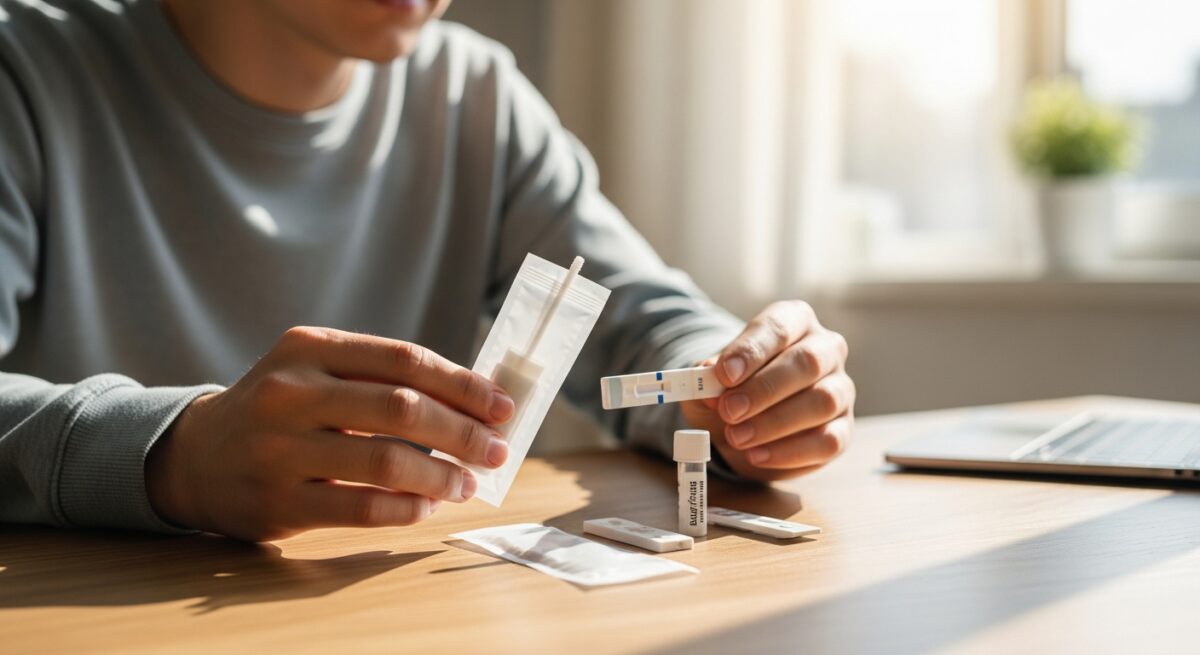
Step-by-Step: How to Use an At Home Rapid Flu Test Kit
Accuracy begins with proper technique. While brands may have slight variations, the general process for using an at home flu test kit is standardized. Following the manufacturer’s instructions to the letter is non-negotiable for a reliable result. Deviations in sample collection or timing are a leading cause of user error and inaccurate readings.
Before you begin, gather all components, typically found inside the sealed kit: a sterile nasal swab, a test device (cassette), a small vial of extraction solution, and a tube holder. Ensure you read all instructions first and check the expiration date. Perform the test on a clean, flat surface. The key steps are as follows:
- Prepare the Solution: Open the vial of liquid reagent and place it securely in the tube holder. This solution will later mix with your sample to prepare it for analysis.
- Collect the Sample: Carefully insert the sterile swab into one nostril, following the depth instructions (usually about 1 inch, or until you meet resistance). Gently rotate the swab along the inside of your nostril for the specified time (often 10-15 seconds) to collect adequate cellular material.
- Mix the Sample: Immediately place the swab into the prepared solution vial. Swirl and press the swab against the inside of the vial for the instructed time (e.g., 10 seconds) to release the viral material into the liquid.
- Apply to Test Device: Remove the swab while squeezing the sides of the vial to extract as much liquid as possible from the swab tip. Then, using the attached dropper cap or by directly squeezing the vial, place the exact number of drops specified onto the sample well (S) of the test device.
- Wait and Read: Start a timer for the exact reading window stated in the instructions (usually 10-15 minutes). Read the result within this window, not before or after. A control line (C) must appear for the test to be valid. A second line next to the (T) or test area indicates a positive result for influenza.
After reading the result, dispose of all components safely in a sealed plastic bag and wash your hands thoroughly. It is critical to adhere strictly to the timing. Reading the test too early can mean the reaction is incomplete, while reading too late can lead to evaporation lines that are misinterpreted as false positives.
Understanding Accuracy: Sensitivity, Specificity, and Real-World Factors
When evaluating at home flu kits, two statistical measures are paramount: sensitivity and specificity. Sensitivity refers to the test’s ability to correctly identify those who have the flu (true positive rate). Specificity refers to its ability to correctly identify those who do not have the flu (true negative rate). No rapid test is 100% perfect. The U.S. Food and Drug Administration (FDA) authorizes these tests, and their performance characteristics are detailed in the package insert.
Generally, the sensitivity of rapid at home flu tests is lower than the molecular tests (like PCR) used in clinical laboratories. This means there is a higher chance of a false negative result: the test says you don’t have the flu when you actually do. Sensitivity can vary but often ranges broadly. Specificity, however, is usually quite high (often over 99%), meaning false positives are less common. A positive result is typically a strong indicator of infection. Several key factors influence the accuracy of your result:
- Viral Load: Tests are more likely to detect the virus when your viral load is high, usually in the first 3-4 days of illness. Testing too early or too late in your infection can yield a false negative.
- Sample Collection: As mentioned, improper swabbing technique is a major source of error. An insufficient sample will not contain enough antigen to trigger a positive reading.
- Virus Type and Strain: Some tests may perform better at detecting Influenza A versus Influenza B, or certain strains within those types.
- Test Storage and Handling: Kits exposed to extreme temperatures or moisture before use may degrade and produce unreliable results.
Therefore, a negative result from an at home rapid flu test does not definitively rule out influenza, especially if you have classic symptoms like sudden onset of fever, body aches, and fatigue. In such cases, consulting a healthcare provider via telemedicine is a prudent next step.
Interpreting Results and Next Steps for Your Health
Your at home flu test result is a piece of information, not a final diagnosis. How you act on this information is what matters most for your health outcome. A positive result strongly suggests an active influenza infection. This knowledge allows you to take immediate action: isolate to prevent spreading the virus, stay hydrated, get plenty of rest, and manage symptoms with over-the-counter medications. Importantly, it also informs a timely conversation with a healthcare provider. Through a telemedicine platform like Doctors Home, you can quickly consult a licensed professional who can evaluate your symptoms, review your test result, and determine if a prescription antiviral medication like oseltamivir (Tamiflu) is appropriate. These antivirals are most effective when started within 48 hours of symptom onset.
A negative result requires more nuanced interpretation. Given the possibility of false negatives, you cannot assume you are flu-free, especially if symptoms are severe or worsening. Consider other illnesses like RSV, COVID-19, or a bacterial infection. The appropriate next steps include monitoring your symptoms closely, continuing supportive care, and seeking professional medical advice if symptoms persist or escalate. Telemedicine is exceptionally valuable here, as a provider can help you interpret the negative result in the context of your full symptom profile and exposure history, and may recommend further testing or evaluation.
Frequently Asked Questions About At Home Flu Tests
How soon after symptoms start should I take an at home flu test?
For the highest accuracy, it is best to test within the first 3-4 days of symptom onset. This is when viral shedding is typically highest. Testing on the first day of very mild symptoms might be too early.
Can these tests tell the difference between Influenza A and B?
Most over-the-counter at home flu kits report a positive result for “Influenza” and do not differentiate between A and B. Some professional-grade rapid tests used in clinics can differentiate, but this is less common in consumer kits.
Are at home flu test kits covered by insurance or FSA/HSA?
Many at home flu test kits are eligible for purchase with Flexible Spending Account (FSA) or Health Savings Account (HSA) funds, as they are considered qualified medical expenses. Insurance reimbursement is less common but you should check your specific plan.
What is the shelf life of these kits?
Shelf life varies by manufacturer but is typically 12-24 months from the date of production. Always check the expiration date on the box before use. Using an expired kit can lead to inaccurate results.
If my test is negative but I feel terrible, what should I do?
Do not rely solely on a negative rapid test result. Contact a healthcare provider. Your symptoms could be caused by another virus, a bacterial infection, or you may have received a false negative flu test. A telemedicine consultation can help guide your next steps.
The advent of at home flu test kits represents a significant step forward in consumer health empowerment, offering convenience and rapid insight. By demystifying how they work and providing a clear-eyed view of their accuracy and limitations, individuals can use these tools effectively as part of a broader health management strategy. They serve as an excellent starting point for informed discussions with healthcare professionals. In an era where digital health solutions are reshaping patient care, combining the immediacy of an at home test with the expertise of a telemedicine provider creates a powerful, efficient pathway to appropriate care, helping you recover faster while minimizing the spread of illness.
About the Author: Laura Simmons


Sign up for our newsletter and Save 20% on Test Kits
"*" indicates required fields